Running QEMU on an Android Host
For a few years, modern flagship phones have had comparable specs to mid-tier computers, which gave me a thought: why can’t you just run a full-fledged virtual machine on your phone?
The short answer is “because virtual machines don’t quite work like that”. The long answer is a bit too complicated for my small brain to properly explain, but the point is that running a virtual machine from your phone isn’t really feasible for the average user.
Fortunately, there’s another solution: emulation.
Properly explaining the difference between virtualization and emulation is also more than my brain can handle, but to oversimplify things, emulation uses a fully-software environment to take commands from the virtual environment (guest) and translate them in a way that the physical environment (host) can understand, while virtualization gives the guest more direct access to the host’s hardware. Virtualization tends to result in less overhead and better performance compared to emulation. Still, emulation comes in handy for environments where the host and quest hardware are not compatible with each other in a way that could allow for virtualization.
QEMU is a program you’ve probably heard of if you’ve worked with virtualization before. What you may or may not also know is that QEMU can be used to emulate a CPU in an environment where virtualization isn’t possible, like, for example, running an x64 guest on an ARM host.
To start things off, we’ll need an app called Termux. There are plans to remove it from the Google Play Store, so you’ll need to get it from either F-Droid or GitHub. Instructions for installing are available from the GitHub repository.
Termux uses a utility called pkg (not to be confused with the BSD rendition of pkg), which we’ll use to install a few packages. First, to make the initial setup a little bit more convenient, we’ll install openssh. This lets us SSH into the phone so we have a proper keyboard for typing commands and writing scripts. Once that’s installed, use the passwd command to set a password, and use sshd to start the server.
pkg install openssh
passwd
sshd
The SSH server runs on port 8022 by default. Termux doesn’t check the username, so you can fill in literally anything there. When you’re done, make sure to shut down the SSH server using pkill sshd.
Now we can install QEMU. There are several QEMU packages available depending on the type of guest you want to run. For our purposes, we’ll install the x86_64 version, but if you want to emulate a different CPU, you’ll need to install the appropriate package.
pkg install qemu-system-x86-64-headless qemu-utils
We’ll make a new directory to hold all of our QEMU files, including the disk image that will act as the storage for our guest. We’ll use the qcow2 format, which has the advantage of taking up space as needed rather than allocating all of it at once at the cost of speed. If you really want that bit of extra performance, you can use the raw format instead. You can also adjust the maximum size of the disk as needed.
mkdir qemu
cd qemu
qemu-img create -f qcow2 boot.img 128G
Now we need to pick our operating system. Linux is the obvious choice, and we’ll go with Arch, since it’ll give us a very blank slate to set up a lightweight environment without being a complete pain to install and configure compared to something like Gentoo. We’ll grab the Arch boot ISO from Arch’s website. Since SSH is open, we can use SFTP to transfer the ISO into the QEMU directory.
With the ISO copied over, we need to get Arch installed on the disk image. We’ll use the below command to launch QEMU with the ISO mounted in the virtual CD-ROM drive.
qemu-system-x86_64 -name ArchBTW -smp 4 -drive file=~/qemu/boot.img,format=qcow2 -cdrom ~/qemu/arch.iso -m 8G -device nec-usb-xhci,id=usb,bus=pci.0,addr=0x4 -device usb-tablet -vga virtio -boot menu=on -display vnc=0.0.0.0:0
To break down the command:
-name: Set up a nice friendly name for the VM. Not strictly necessary, but definitely aesthetic.-smp: Set the number of CPU cores the VM will use. Depends on you and your phone’s hardware.-drive: Mounts our disk image in the VM.-cdrom: Mounts our ISO as a CD-ROM. A bit of a convenience function for some of the possible options of-drive.-m: Set the amount of memory for the VM. Like the CPU cores, this depends on your preferences and hardware.-device: Configures emulated hardware devices. One of them is a USB controller, and the other is our emulated mouse that it plugged into said controller. There can be weird mouse issues without that specific input device.-vga: Selects what kind of video output we want to emulate.virtioin particular has some 3D support, although it’s apparently still kind of beta-y.-boot: Sets the boot order.menu=ongives us the option to see the boot menu and manually override the boot order if we need to.-display: Sets how we will interact with the VM. VNC is the easiest to set up, although also the least secure.vnc=0.0.0.0:0means to listen on all IP addresses on port 5900. You may want to change this tovnc=127.0.0.1:0to make the VNC server only accessible from your phone once you’ve finished the initial install.
Now we can just follow the instructions in the Arch wiki to install Arch. A couple notes on the install process:
- QEMU boots in BIOS mode by default, and at the small disk sizes we’re working with, it’s just easiest to set up the disk as an MBR volume as opposed to a GPT one.
- The Gentoo wiki recommends setting your swap partition size to twice the amount of RAM you have, and I’ve used that recommendation for my Arch installs.
- Make sure you install all the packages you’ll need during the
pacstrapstep, or at the very least install them during thechrootstep before your first reboot. - I used the
linux-ltspackage as opposed tolinuxbecause I’ve experienced issues related to bleeding-edge kernel updates. - The full list of packages I installed is below.
- You can use
useraddto add your user account during thechrootstep, since it’s a bit complicated to log into a desktop environment as root in most cases. - Make sure to enable at least the
dhcpcdandsddmservices usingsystemctlduring thechrootstep.
We could just keep the install extremely lightweight by not installing a GUI of any kind, but there’s not a lot of point in that when we could just be using Termux instead, so we need to pick a desktop environment. The decision seems to come down to LXDE and LXQt, two of the more lightweight desktops available for Linux. LXQt uses a few more resources, but it’s also more aesthetic, which is very hard to find in a Linux desktop.
Now we just wait patiently for Arch to do its Arch things. Once it finishes, we’ll do a shutdown rather than a reboot and modify our QEMU command slightly to remove the ISO.
qemu-system-x86_64 -name ArchBTW -smp 4 -drive file=~/qemu/boot.img,format=qcow2 -m 8G -usb -device nec-usb-xhci,id=usb,bus=pci.0,addr=0x4 -device usb-tablet -vga virtio -boot menu=on,strict=on -display vnc=0.0.0.0:0
If you haven’t already, grab an Android VNC viewer of your choice to make the VM truly mobile. If you don’t have a preferred one already, RealVNC’s implementation works fine, although you may need to change the quality setting from “Auto” to “High” due to a bug.
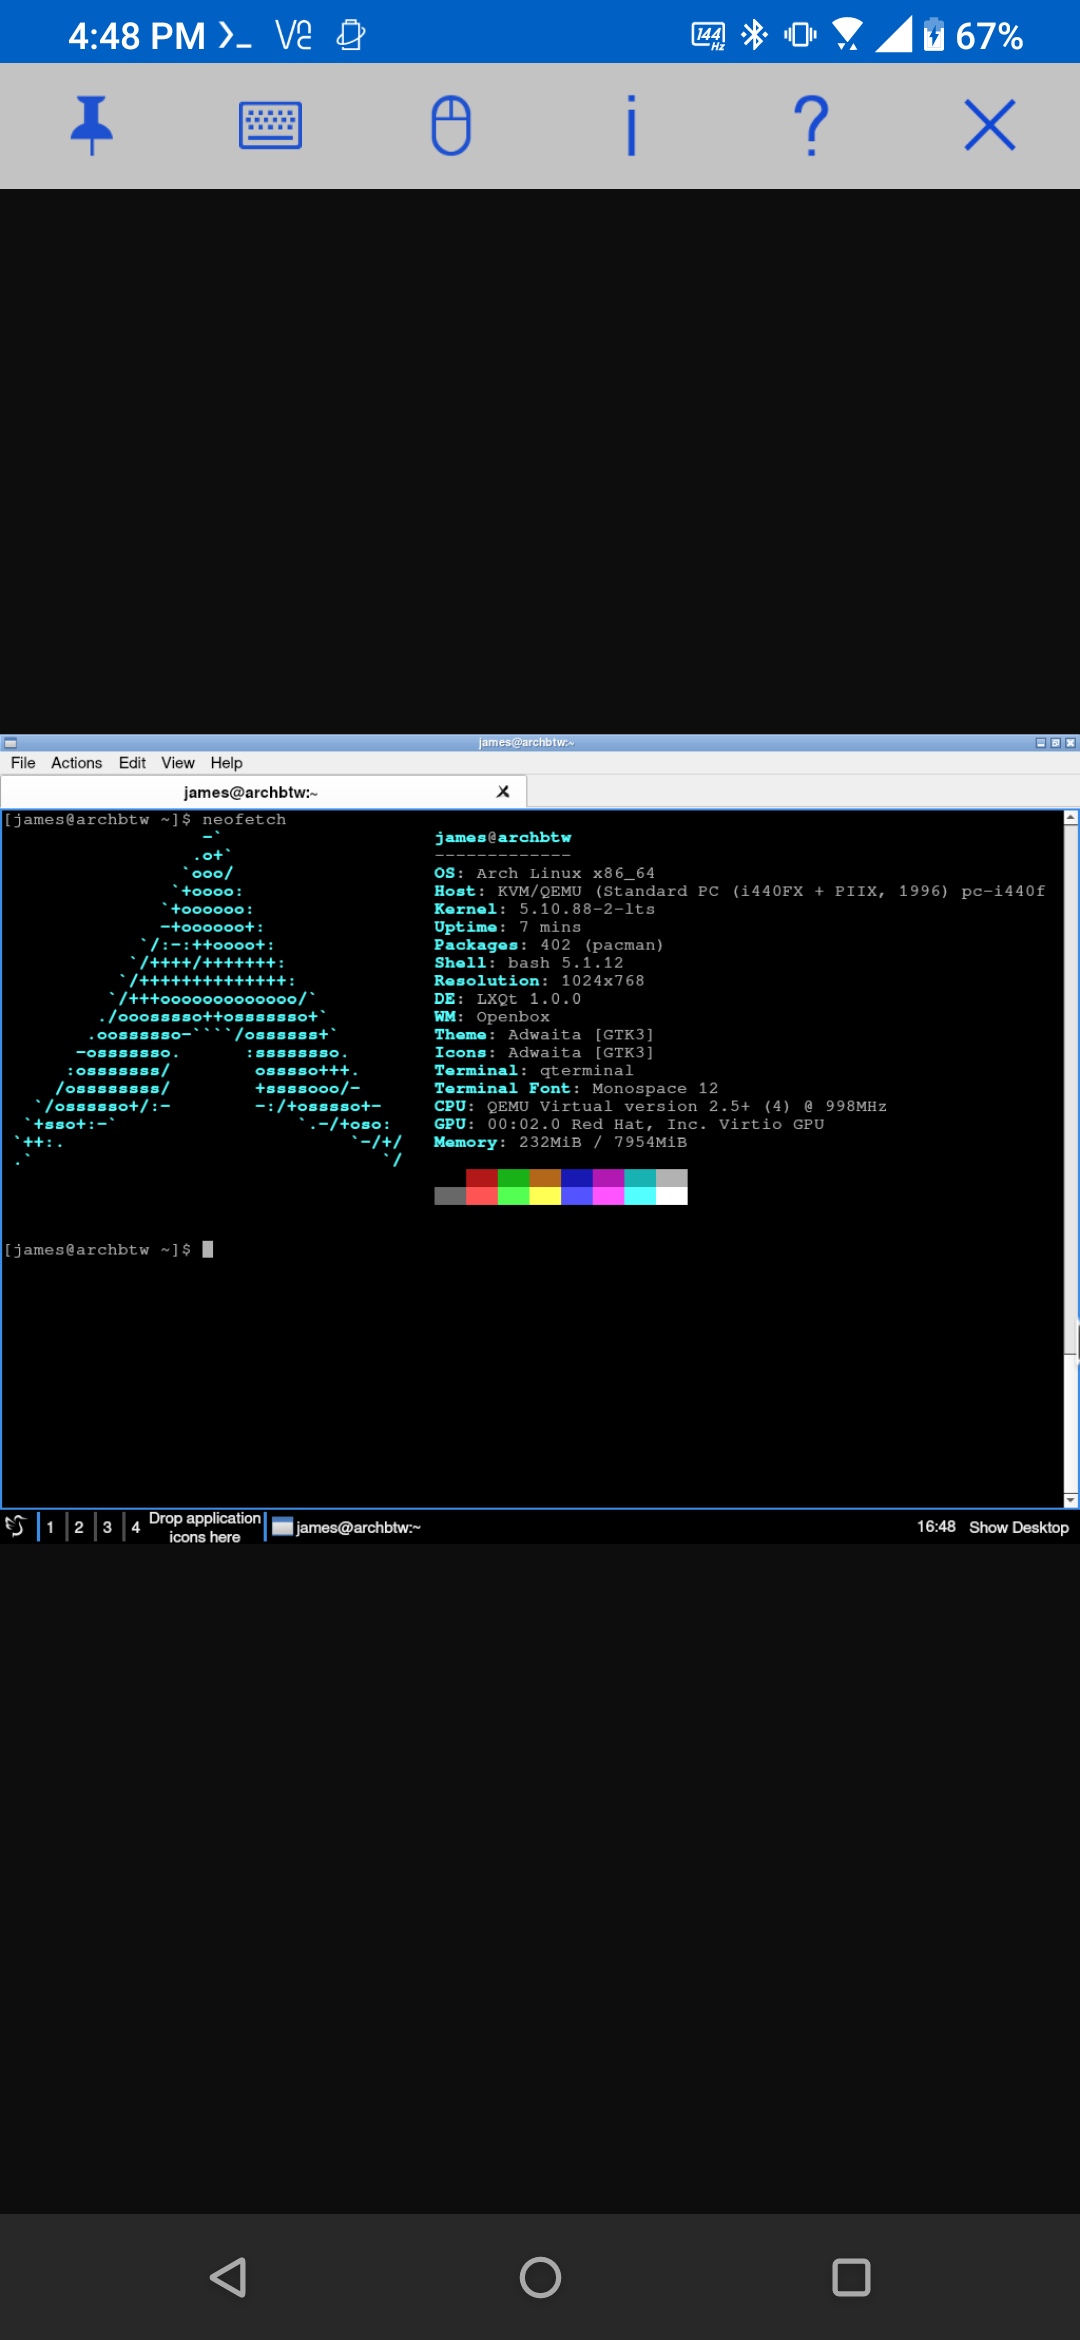
And the end result… doesn’t work particularly well. It’s surprisingly usable, but there are definitely noticeable performance issues. Like I mentioned earlier, emulation has more performance overhead than virtualization does, and despite the specs looking good on paper, in practice a phone doesn’t have the same performance horsepower that your computer would. Still, for whatever it’s worth, you can now brag to your friends that you have a full-fledged desktop computer in your phone.
One interesting side-note: I initially wanted to run Chrome as the browser for this VM since it apparently it has more efficient CPU usage compared to Firefox, and, despite what the Internet would like you to believe, the memory usage between them is pretty comparable. However, there seems to be a bug where running Chrome in the VM crashes QEMU. I’m not sure if it’s a Chrome issue or a QEMU issue, but it’s an interesting interaction.
Packages
base
linux-lts
linux-firmware
sudo
nano
grub
man-db
man-pages
texinfo
dhcpcd
qemu-guest-agent
lxqt
sddm
pcmanfm-qt
qterminal
gvfs
mlocate
pkgfile
firefox